|
|
 |
|
|
|
|
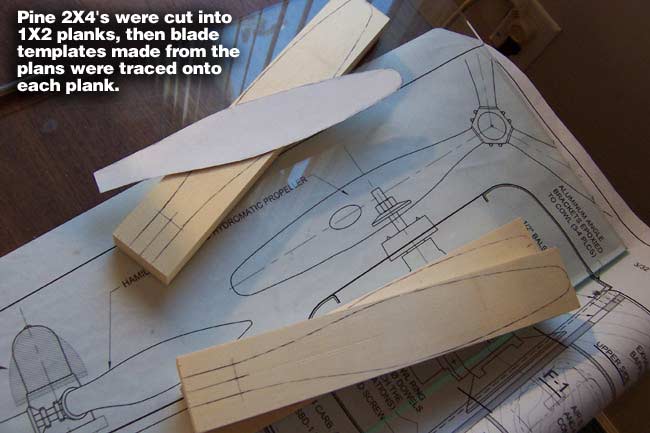
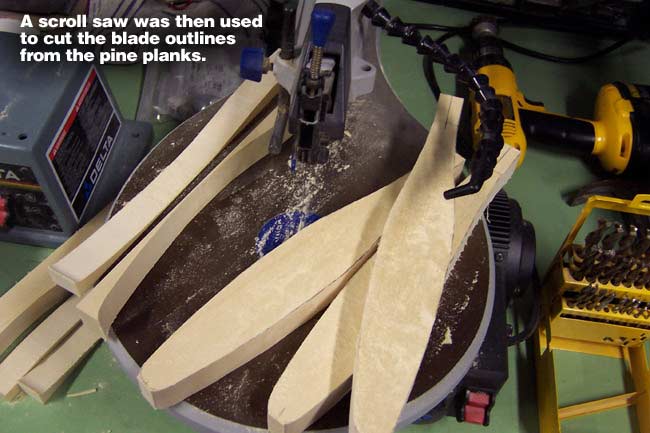
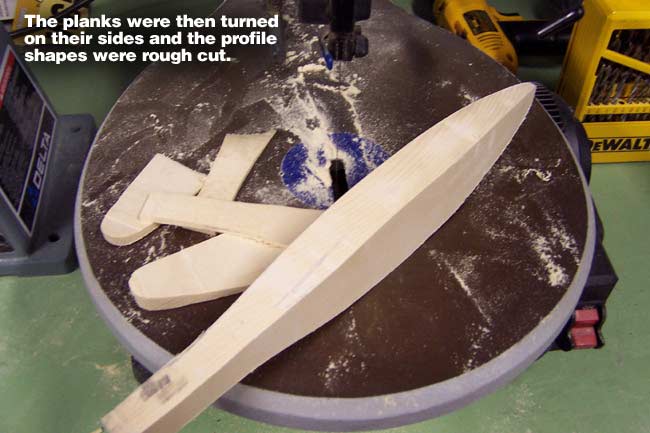
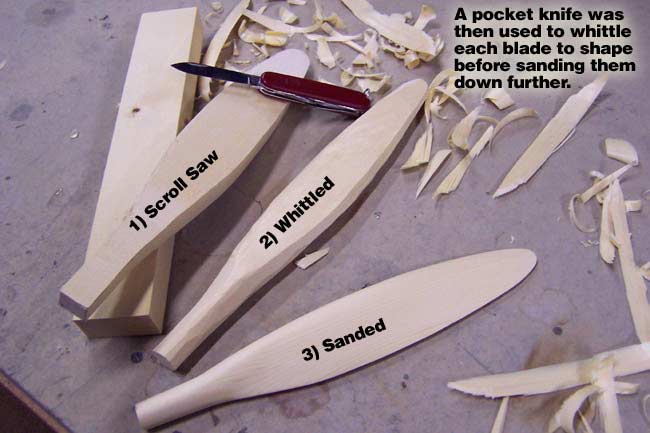
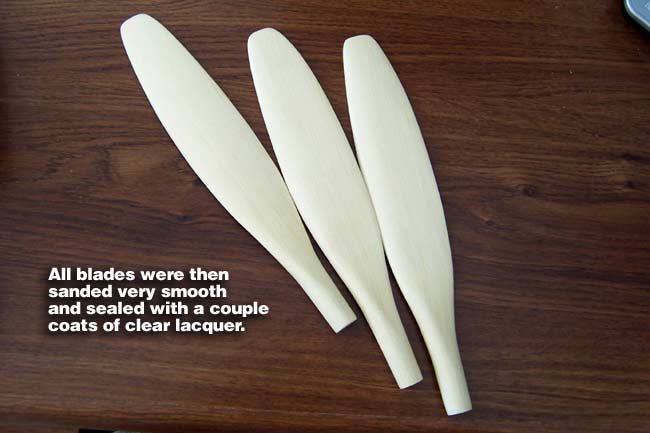
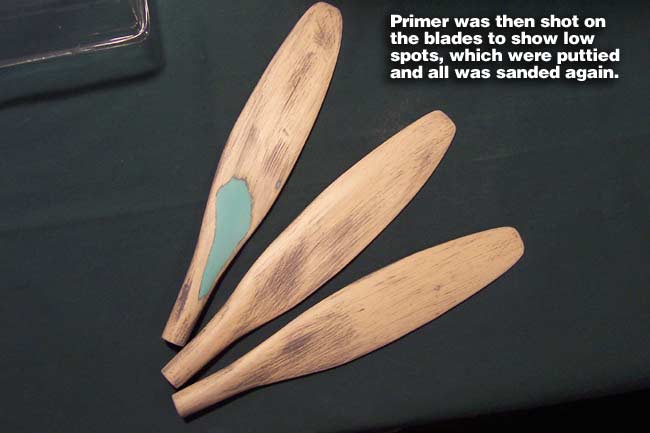
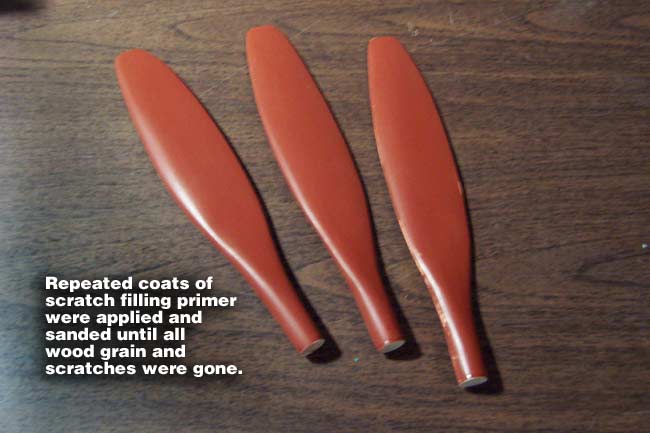
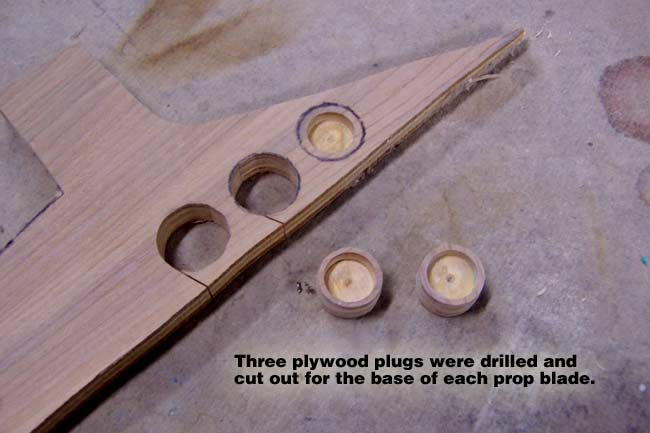
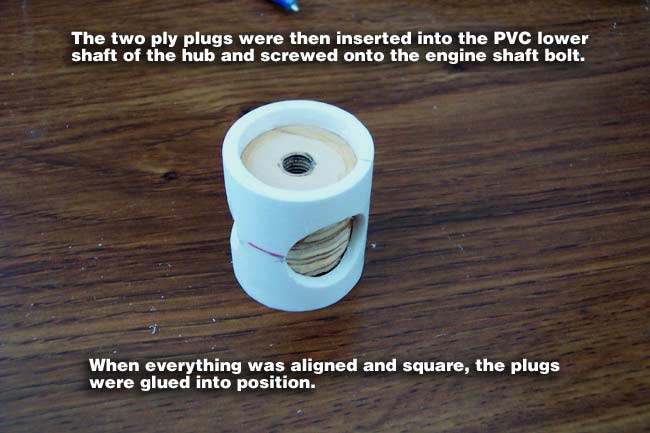
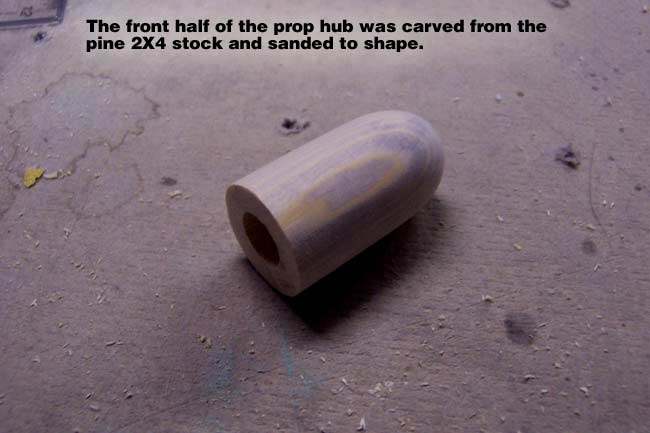
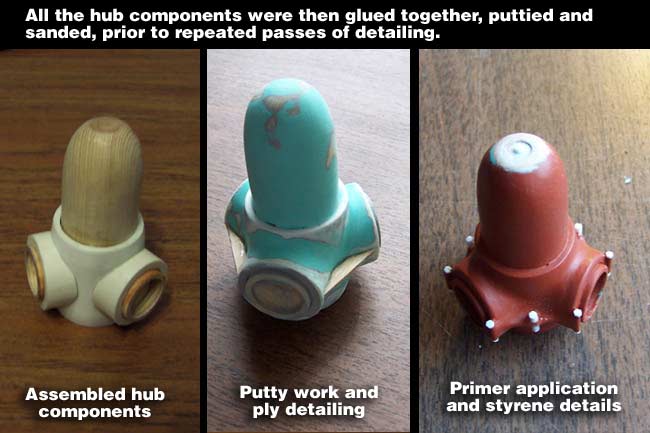
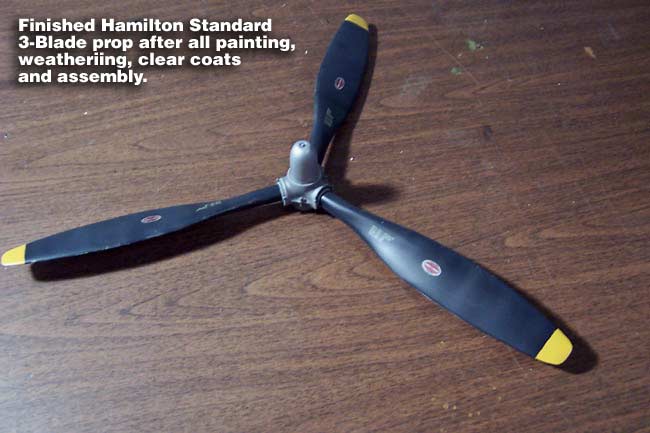
Making a Static Prop The SBD uses a 3-Blade Hamilton Standard prop, so I needed to make one for static display & competition. I could have purchased one already made, but it was a minimum of 2-3 weeks wait, and $80 to boot. Being both impatient and broke, I figured I'd try to make one myself. I could have bought a couple wooden flight props and modified them, but I'd still have to order them, wait, and spend a good $40 or so to get them. So, I decided to try my hand at fabricating them from scratch, which ended up taking me about 3-4 days and only cost me about $3 total. Carving the Blades First I made the 3 blades for the prop. I made these by tracing templates from the plans onto posterboard, which I then transferred onto wooden planks. These planks were 1 X 2 strips I cut from a standard pine 2 X 4 board. With the front and side profiles drawn on the planks, I cut the rough shape of the blades out of them with a scroll saw. Next I put on my "Huck Finn hat" and whipped out my pocket knife. I carefully whittled away at the first blade until satisfied with the shape, then whittled the other 2 to match. I then sanded them further to get down to the final shape and size. With the shape of all 3 blades worked out, I sealed the blades with a couple coats of Deft clear lacquer. The next step was to shoot them with primer to find all the bad scratches, low spots, etc., which were filled with green spot putty and sanded down. I was still having some problems with wood grain showing through, so I repeatedly shot them with scratch filling primer and sanded until satisfied with the finish.
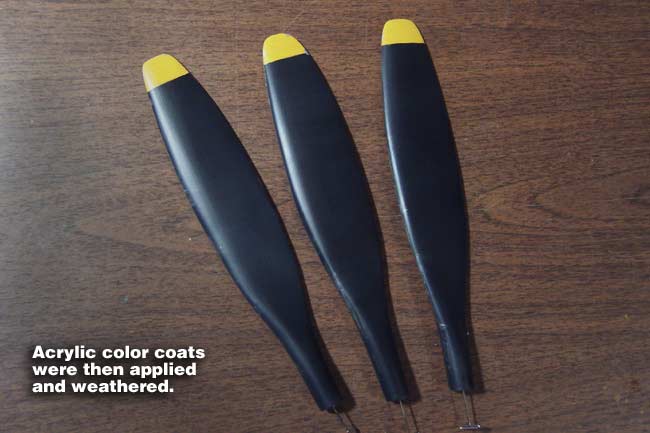
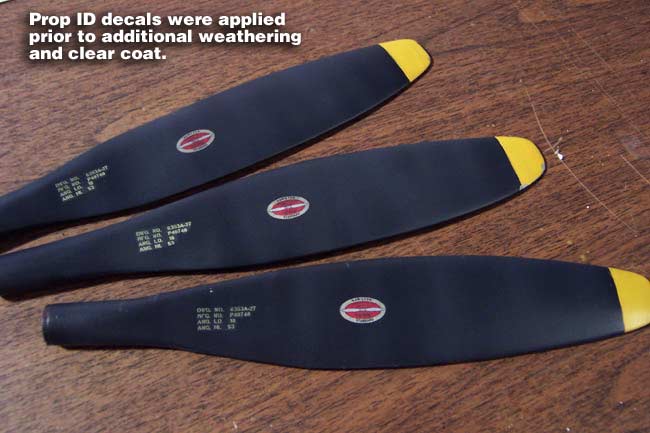
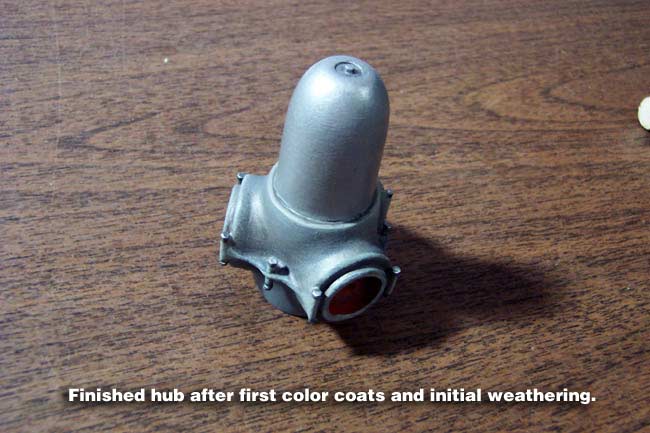
With the surface to my satisfaction, I painted the scale black color coat on, added the yellow tips, and did some weathering. The color coats were painted with water based hobby acrylics. Next I added the Hamilton prop ID decals, did a little more weathering, and added a clear coat to seal and protect the blades.
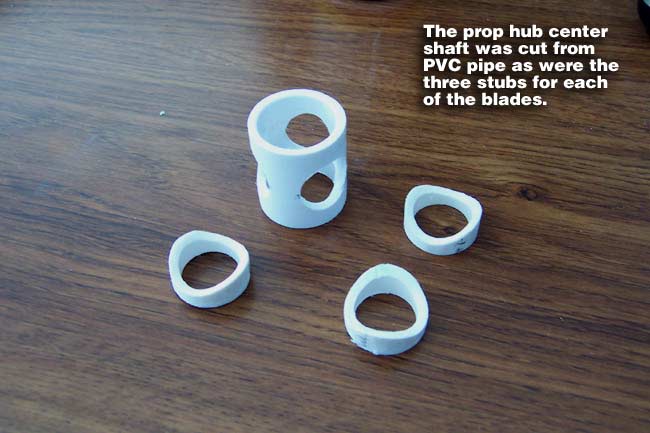
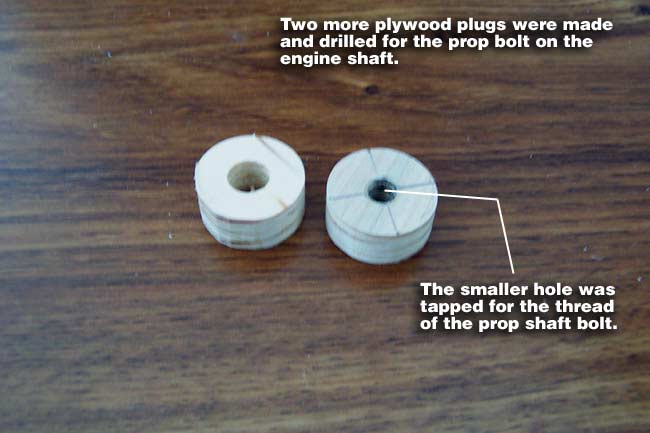
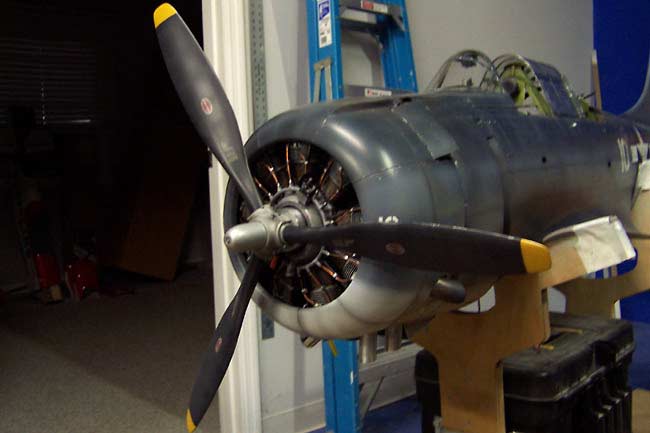
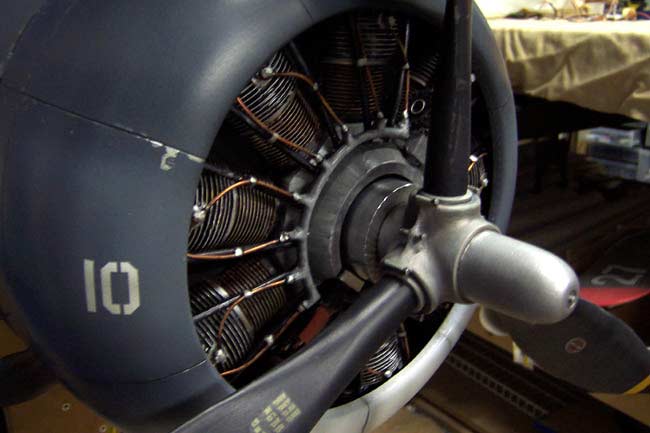
Final Assembly With everything fabricated and painted, I then epoxied the three blades into the hub and spun it onto the engine shaft. Everything looked pretty good, and another detail is behind me. It's not the "perfect" static prop, and I'm sure someone will point out the flaws in comparison to the actual fullscale prop. But, I'm pretty satisfied with it for now, especially since it only took me a few days to get it done and only cost me 3 dollars in materials!
|