Starting on the Wing

|
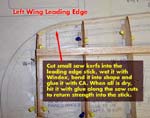
One of the trickier parts of this phase was trying to bend the last few inches of your leading edge balsa stick to begin the curve into the wingtip. I did this by cutting many small saw kerfs into the stick to allow the balsa to compress while bending. Next I wet the stick down a little with Windex, which makes it bend easier and dries quickly.
Once you get it bent into shape (broke quite a few trying), glue it into place with CA. Once the glue and stick are good and dry, I saturated it a little with CA to harden the wood, and fingerpainted some alyphatic resin over it to fill in the saw kerfs. When the glue dried, I sanded it to a smooth, strong surface. Next, I moved on to sheet the left wing with 3/32" balsa as well.
|
 |
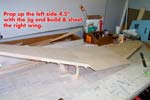
 With the left wing done, you repeat the process for the right wing. Prop up the left side at the wing joint with the center section and begin building and sheeting the right side of the wing. With the left wing done, you repeat the process for the right wing. Prop up the left side at the wing joint with the center section and begin building and sheeting the right side of the wing.
By the way, the plans tell you to install all your pushrods, bellcranks, etc. prior to sheeting the top side, but I didn't like that approach and sheeted first.
|
Phase 1 Complete!
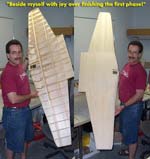
This is how I get so much done... there are two of me! Sometimes I wish there were! This pic shows completion of what I'll call "phase 1" of building the wing. This includes framing up the wing and sheeting the top side only.


"Building Control Surfaces"
|

